Multiple time zone support
If your audience is spread across different time zones, you can configure the system to show times in the users’ own time zone. The system can display the calendar in another time zone, or it can display appointment times in two zones at the same time, or both.
Configuring time zone support
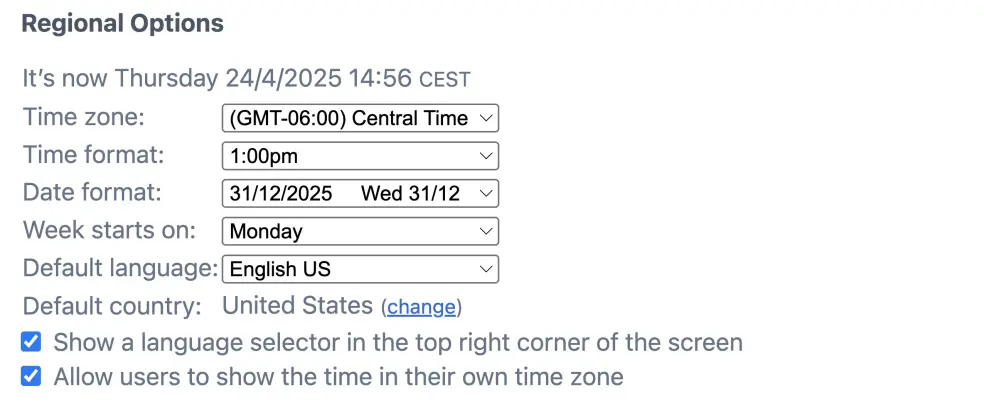
To configure time zone support, you need to ensure your account’s base time zone is set correctly on the Layout Settings screen. By default, the time zone is set based on your country, but you may need to adjust it if your country has multiple time zones. The administrator and users who are not logged in, will see times in the schedule in the base time zone. Keep in mind that the base time zone influences the information sent to, and imported from, connected calendar programs such as Outlook or Google Calendar. Appointment times passed through webhooks to other web services are also affected.

When you check the option , a set of options appears. These allow you to specify whether the entire calendar should be displayed in the user’s time zone and/or whether appointment times should be displayed in both zones or a single one.
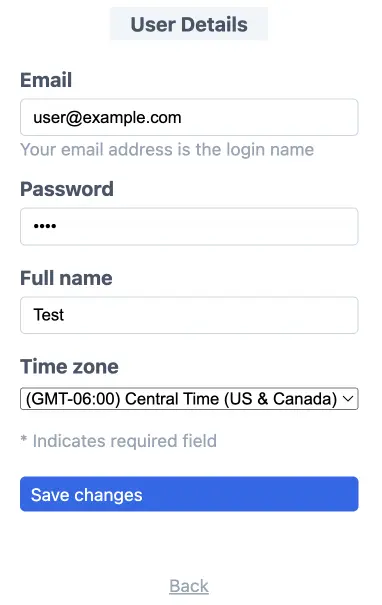
Once a time zone option is configured each user will see an additional time zone setting upon signing up. Existing users can change their time zone with the Your settings link in the top right corner of the schedule page. You can view and change your users’ time zone setting on the User Management screen.

Using a schedule in a different time zone
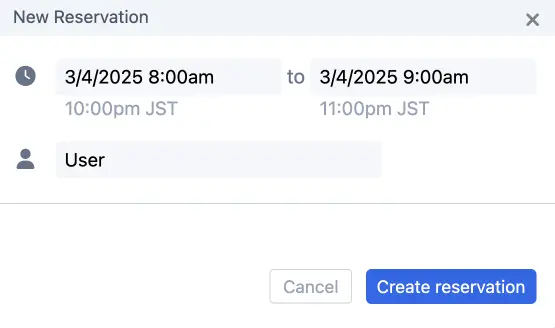
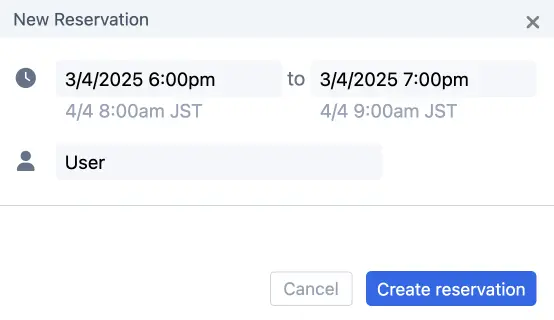
As an example, let’s assume you switched to dual time display and your account is configured in US Eastern Time. When a user from Japan, who has their time zone set to Japanese Standard Time, visits your schedule, they would see both times displayed in the popup when they click your schedule. If the time spans a date, then the date will be added to the time as well.
Furthermore, if an appointment covers multiple time zones, the system will handle it correctly by displaying the appropriate time zone names next to each time. This is especially useful for multi-day appointments that start during Daylight Saving Time (DST) and end when DST is no longer in effect. When calculating the time zone difference, the system will automatically take into account differences caused by DST periods in your location and the user’s location. Dual time display will also be reflected in email notifications and reminders.
If you would like to see what your user sees, you can click the blue icon next to their name on the User Management screen to “act as” the user.
$now and $zone in the white space above the schedule to show the current time and time zone of the schedule currently being displayed.


iCal time zone support
You can add a so-called “iCal attachment” to email confirmations by placing the auto-text word $ical in the email text.
The email text can be changed via Configure > Layout.
The iCal attachment contains all the information necessary for the calendar program on the user’s computer or phone to display the appointment at the correct time in their own zone.
A calendar program such as Outlook will typically display times in the time zone set on the computer, the time zone set by the user in SuperSaaS is not used.
You can also subscribe to the iCalendar feed of a schedule with a calendar program, such as Outlook or Apple’s Calendar, as described in Syncing with other calendar programs. That will display appointment times in the calendar program on your computer in the time zone configured on your computer.
External Calendar programs and time zone support
If you are import free/busy information from Google or Outlook Calendar to display on your schedule then the system will automatically translate between the time zone configured in Google Calendar and the time zone used in SuperSaaS. This also happens if you publish appointments to Google Calendar. For this reason, you may want to ensure that the time zone is set correctly in your Google Calendar or Outlook account.