This tutorial uses a cupcake workshop with a waiting list function as an example of how to set up an online event schedule. With small modifications you can use a similar setup for many different events that require that users sign up. For instance, if you intend to have people sign up for a sporting event, or you want to organize a party.
We refer to this type of appointment system as a “capacity-type” schedule, with a single slot. On the other hand, if you have several events, and need people to select an event date from a calendar, or if your event has several components that can be selected separately, the capacity schedule tutorial would probably suit your requirements better.
If you are planning to split the event into time slots where each slot can be booked by one person, like you would for the signup for a parent/teacher evening, the resource schedule tutorial would be more appropriate.
Signing up for a single event
In this example, you can create an online event schedule for a single event aimed at a group of people.
This tutorial demonstrates the following customizations:
- using the event schedule as a simple sign-up form
- adding more elaborate functions such as an automated waiting list
- collecting payments with each sign up
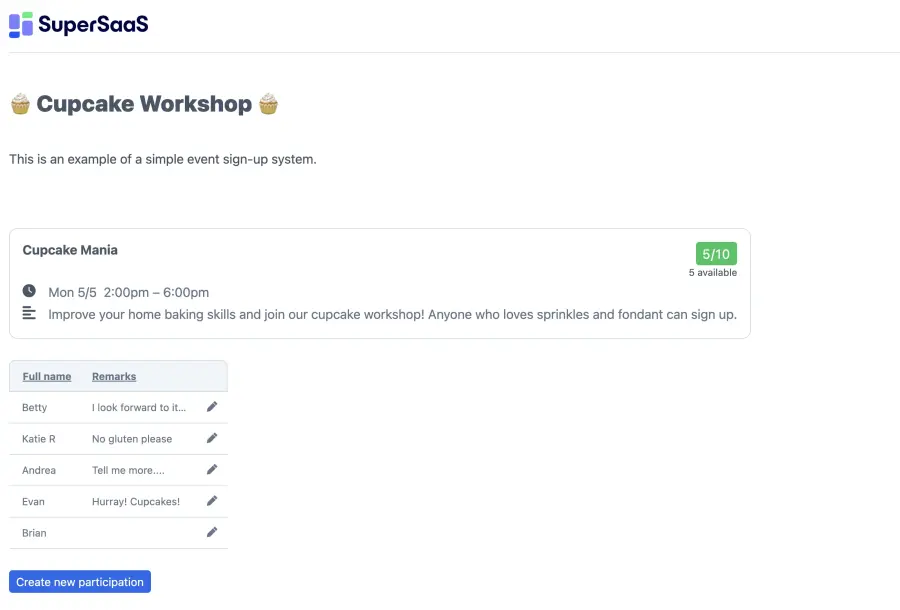
You can view the end result on the cupcake workshop demo. It’s possible to modify that page to make it appear as part of your site, but you can also integrate a SuperSaaS schedule as a so-called “widget”. A widget can appear as a small frame on your site, or as a small button, like the one below. With a widget, users can view availability and create a booking, but to change or cancel a booking later they will need to use the full schedule link, for example from their confirmation email.
Setting up the schedule in 5 easy steps
The easiest way to set up an appointment schedule is by using a build-and-test cycle: After the initial configuration you try it out, make changes, and repeat, until it works the way you want.
Step Setting up a basic schedule using the New Schedule Wizard
Step Adding the event to the schedule
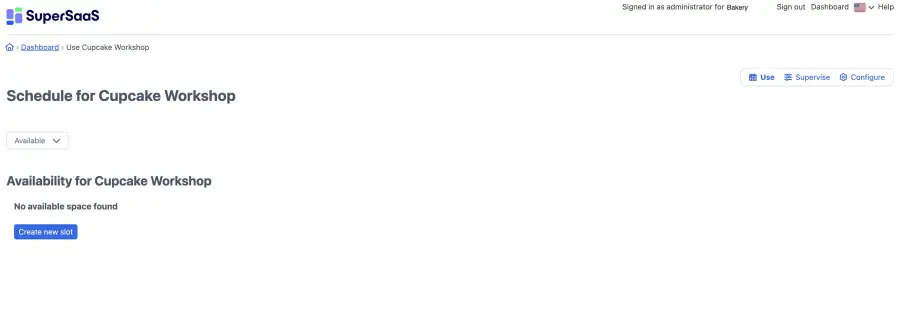
Regular users will see the same appointment schedule but with fewer options. You can also find the Use button on your Dashboard page. You can access your Dashboard via the menu in the top right corner of your screen. Furthermore, you can also bookmark the page in your browser for daily use.
Create a slot for your workshop
Create a slot that will contain the information participants need to know about the cupcake workshop. When you click Create new slot, a popup window appears. If this window is in an inconvenient place, you can simply drag it to a more suitable place on your screen.
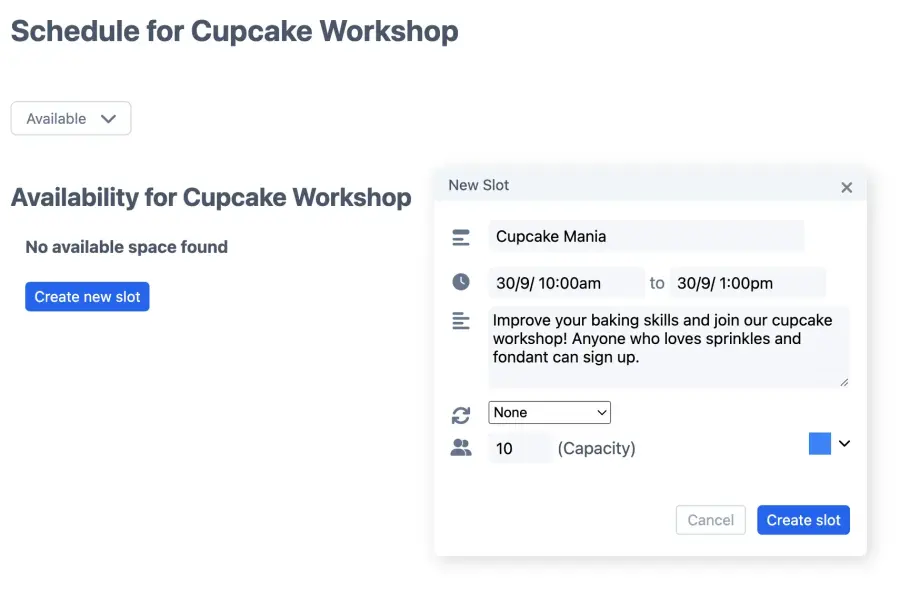
Fill out the date and a descriptive event name, such as “Cupcake Mania”. You can add an image to the “Description” field by entering a link to an image that is available online (i.e. starting with “https:”).
You can also use this field to give a more elaborate description to your online event schedule, such as: “Improve your baking skills and join our workshop! Anyone who loves sprinkles and fondant can sign up”.
Step Adjusting the configuration
The Overview contains a summary of the options you can change. Here you can temporarily block the schedule or delete it entirely.
The New Schedule Wizard made a number of assumptions when you set up your online event schedule. One of those assumptions is that you don’t want to show a calendar screen. You may want to switch this back on if you have multiple events on offer.
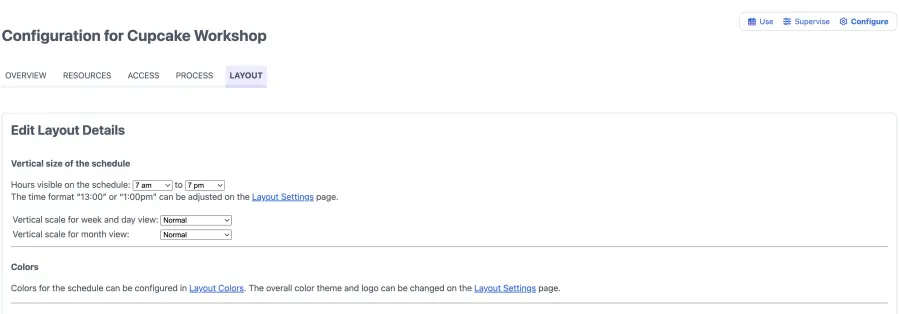
Change the layout
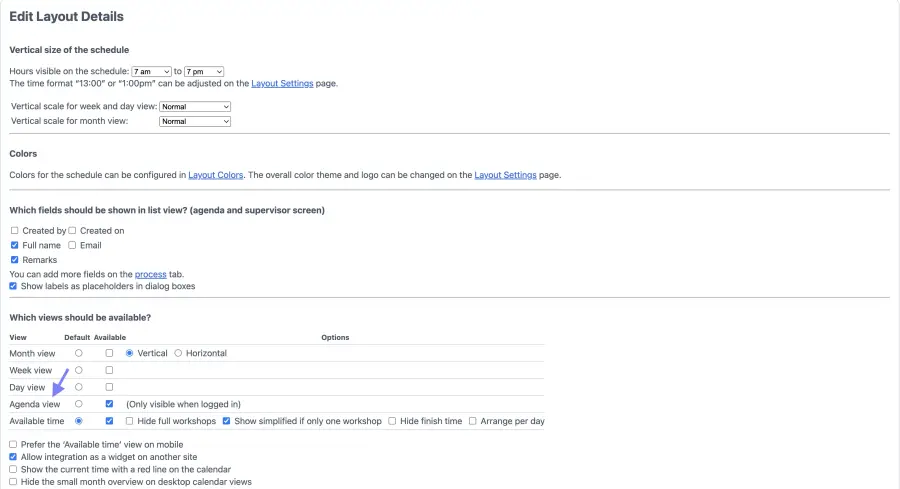
Under Layout, you can configure which views should be available to your participants.
Select the option Show simplified if just one event, which optimizes the layout for a single event. If you uncheck it, the layout of the Available tab and the event slot will change to accommodate multiple events.
In the standard view, you would be able to edit the slot by first clicking it and then clicking on Edit slot. You can edit the slot in the simplified mode under Overview, which you can access via Supervise. For a single event like a cupcake workshop, you may want to further simplify the schedule by limiting the overview tabs to the Available and Agenda views.
On this page, under Message to show at the top of the schedule, you can create custom messages and include HTML text, image(s) or links to give participants more information about the workshop. Save changes at the bottom of the page before moving on to the Access tab.
Determine who can access the schedule
The system also provides default settings for who can sign up for your workshop. You can, for instance, ask participants to create a login or allow anyone who can see the schedule to sign up for your workshop. Find out more about the access options under Controlling access to your schedule.

Determine your resource parameters
The Resources tab contains the settings that define the general parameters of your online event schedule. The first option deals with naming the resource appropriately. If you decide to give your event a new name, you can change it here.

The terms you select to be used instead of the default “slot” and “booking” will be used throughout the online event schedule – including in error messages, email confirmations and help pages. In this case, you can enter the custom term “workshop”. Enter the singular form and the system will convert it to the plural form where appropriate.
You can also change the term used for “user” to “participant” for example, but this setting can be found via Layout Settings (keep in mind the terms you set here will apply to your entire account).
You can then determine the workshop’s capacity (i.e. how many people can attend the event). If you want to create several online event schedules with different capacities, you can enter the appropriate number for individual events when you create them. Entering zero will not allow anyone to sign up, while entering a dash will switch off limit checking entirely.
The second field determines how many places a person can book with one reservation. Setting this value to anything other than one will change the user interface to include a quantity field when making a reservation. For this event, you can leave this at one, but if you are using an online event schedule to sell tickets to a play, for instance, it would make sense to allow people to buy multiple tickets at once.
Decide whether you want participants to be able to make a second reservation for the same event. Note that the system can only identify a user by their login name. So if you allow people to create their own login name (or allow anonymous bookings) the system cannot prevent people from making a second reservation by creating a second login name.
Set up the waiting list
Determine whether you would like to offer participants the option of putting their name on a waiting list if your online event schedule is fully booked. The choices are simply to deny booking, to allow only those with administrative or superuser access to override the limit, to ignore the limit altogether, or to create an entry on a waiting list.
The waiting list creates a separate list for each event and remembers the order in which people entered their names. If the box for automatic placement is checked it will automatically schedule the first person on the waiting list if someone cancels.
Upon booking, a quantity field will appear that allows participants to enter the number of places they want to book. You can change the field name “quantity” to a more appropriate term such “number of seats”, via Process, where you will find the section What information should the client enter with each reservation. Here, you can select the second Customize link and enter the appropriate field name.
If someone requests more spots than are available they will be moved to the waiting list until enough room is available. Should a participant cancel their booking, automatic placement will only take place if there is enough room to satisfy the quantity requested by the first person on the waiting list.
As administrator, you can move people from the waiting list, at any time, even if that means group totals would go over the set limit.
Add a location
Specify where the event takes place by adding the address to the location field. If you have multiple classes, the interface will make room for the additional information. This can be used to specify where the event takes place if you have multiple classes. If you publish your calendar this information is also transferred to the appropriate location field in Outlook, Apple or Google Calendars.
Add a price
You can set the price of your event or add online payment. By clicking Setup pricing you can create advanced pricing rules, such as an extra charge for lunch before the event. This is discussed in detail in the section Adding payment to your schedule.
Adjust the time
Under “Time”, you can set a default length for slots and modify the user interface for time display. Rounding all times to whole days can be a good idea if you are using SuperSaaS for events that span multiple days.
Step Testing the schedule from a visitor’s point of view
Every appointment schedule has its own URL, which can be viewed via Configure under Overview. Importantly, the signup sheet looks a bit different to you than it does to your users.
Your users will not see the Supervise and Configure buttons, and will typically not be able to see and change the appointments of other users. To view the schedule from your user’s point of view log out as administrator with the link in the top right menu, and then go back to the schedule page. You can speed up this process by using a second browser, or by using an anonymous browsing tab, the section “Testing the schedule you created” discusses this in detail.